Senlo Face / OBS setup
Your character.
On your call.
Send your live transformation into OBS, then choose OBS Virtual Camera in your calling app. Set it up once and use it whenever you go live.
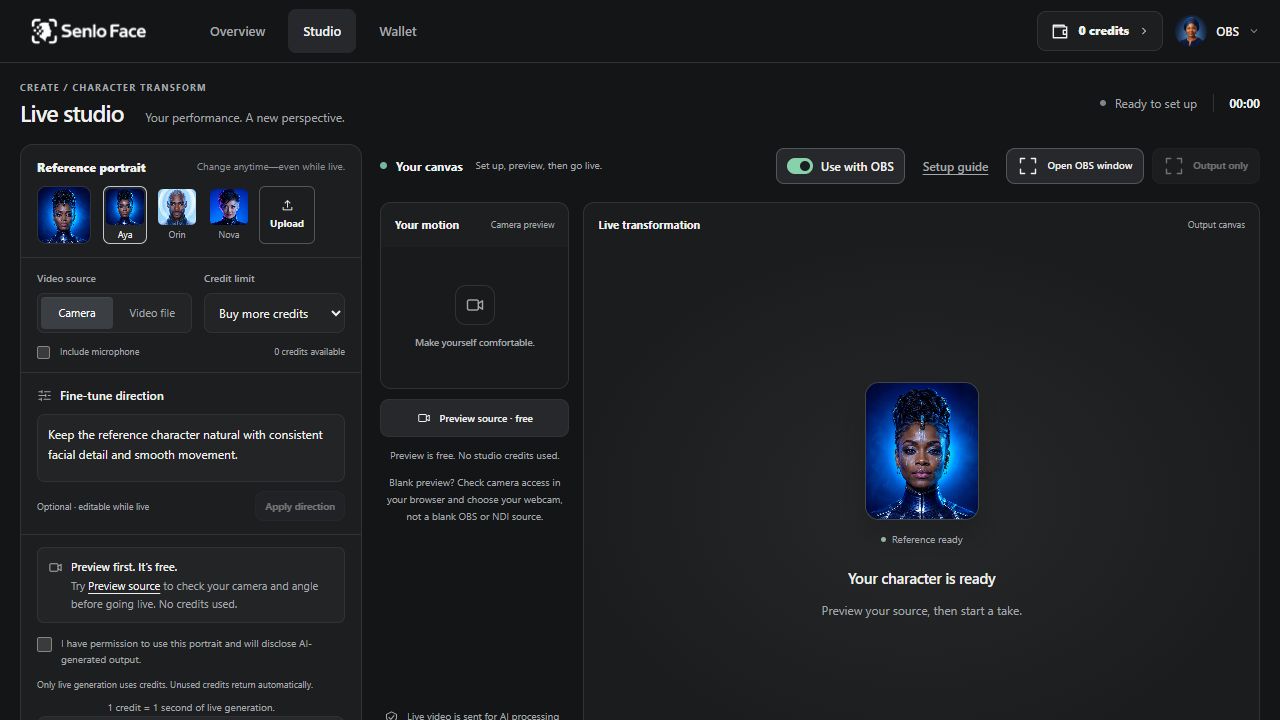
Real Senlo Face and OBS screens from Windows. Blue markers show what to click. Click a screenshot for a closer look; OBS labels may vary by version.
Open the clean output window
In the studio, choose a portrait and use Preview source · free to check your camera. Turn on Use with OBS, then click Open OBS window above the output canvas.
Keep the studio tab open. The separate window shows only your transformed video—or a standby screen until a take starts—never the camera preview or controls.
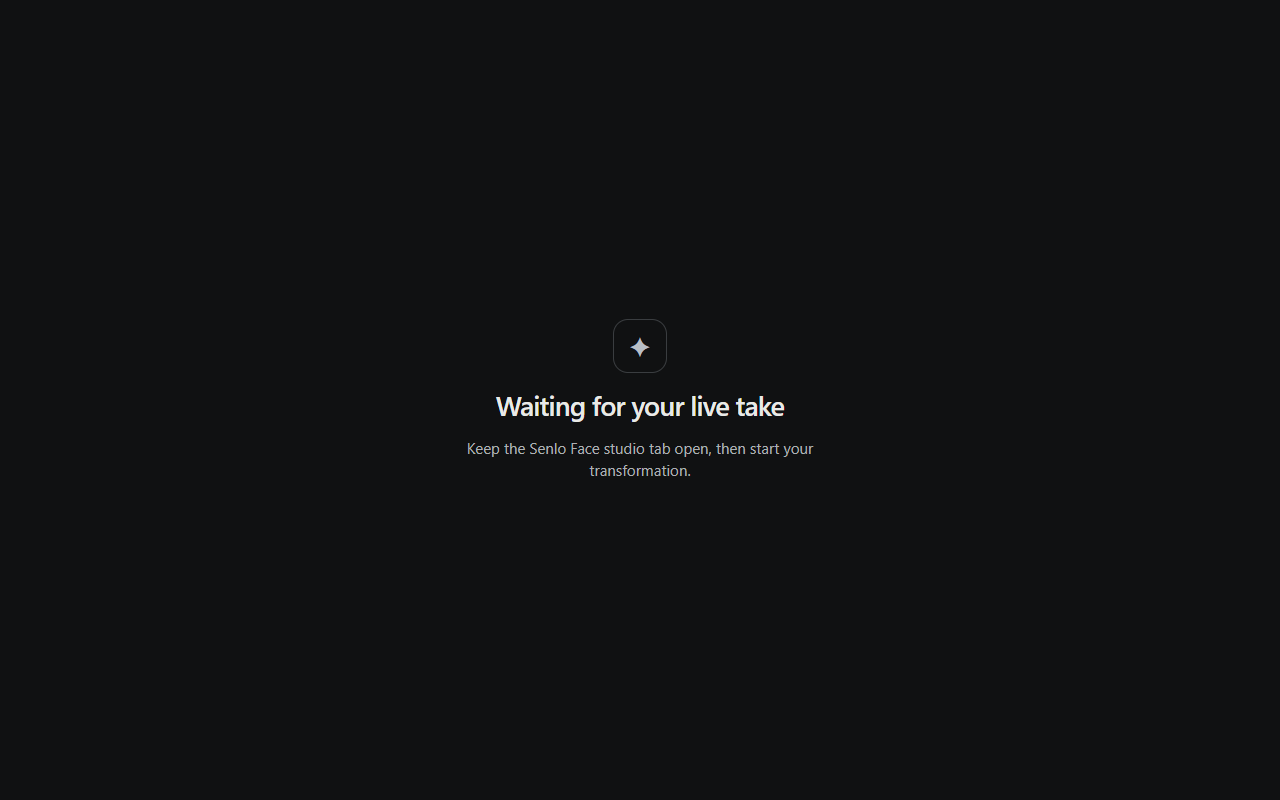 The separate output window before a take.
Add Window Capture in OBS
In OBS, click + under Sources, choose Window Capture and give it a name such as “Senlo Face output.” Choose Window Capture, not Browser Source or Video Capture Device.
Choose the Senlo Face output
In the Window dropdown, select Senlo Face — OBS Output, not the main studio tab. Keep Client Area checked, turn Capture Cursor off, then click OK.
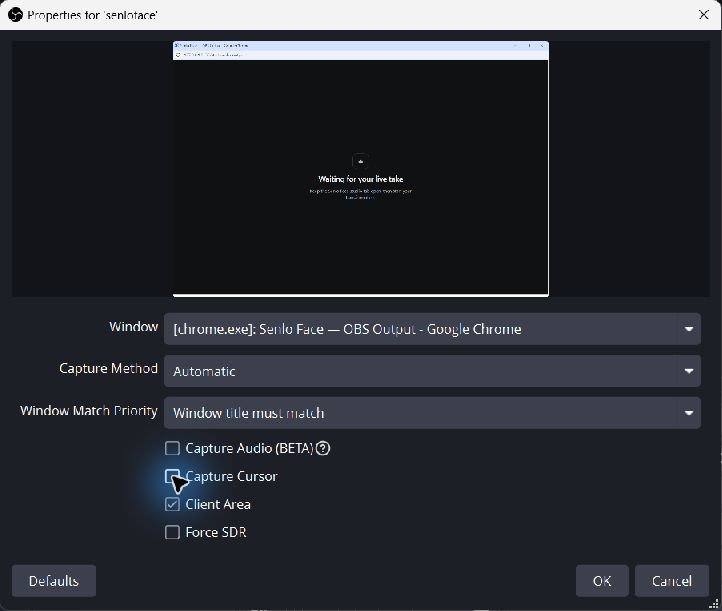
Align the frame in OBS
Drag the selected source’s red handles until the output fills the OBS preview, like the clip shows. If a browser header remains, hold Alt while dragging the top edge inward to crop it away.
If needed, right-click the source and choose Transform → Fit to Screen. Click outside the source to check the clean frame. This adjustment uses no credits.

Start the virtual camera
Click Start Virtual Camera in OBS. In your desktop calling app, select OBS Virtual Camera and check its preview before joining.
Use your usual microphone in the call. When a take ends, the output returns to standby rather than showing your raw camera.
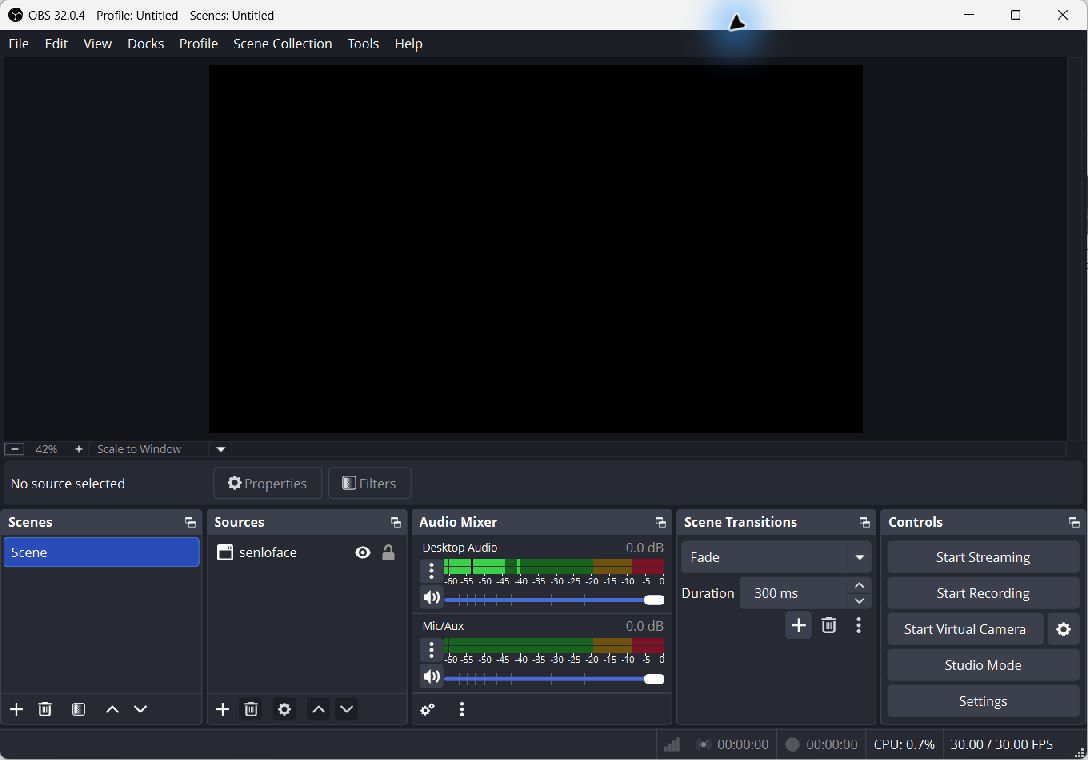
Quick checks
Still seeing the standby screen?
That is normal until a live take begins. If it stays there, keep the studio tab open and confirm OBS is capturing the separate OBS Output window—not the main studio. If the window disappears from OBS, open it again from the studio.
Virtual camera support depends on your desktop calling app. This does not make Senlo Face a selectable camera inside mobile WhatsApp.
For OBS controls, see its Window Capture and Virtual Camera guides.